
Series: Lập trình Raspberry Pi & Ứng dụng thực tế Phần 3 — Python “build app thật” Bài 13: REST API với FastAPI (health, metrics) — để gateway/app “có endpoint” như production
1) Mục tiêu bài học
Sau bài này bạn sẽ:
- Thêm FastAPI vào project (Bài 12).
- Tạo 2 endpoint quan trọng:
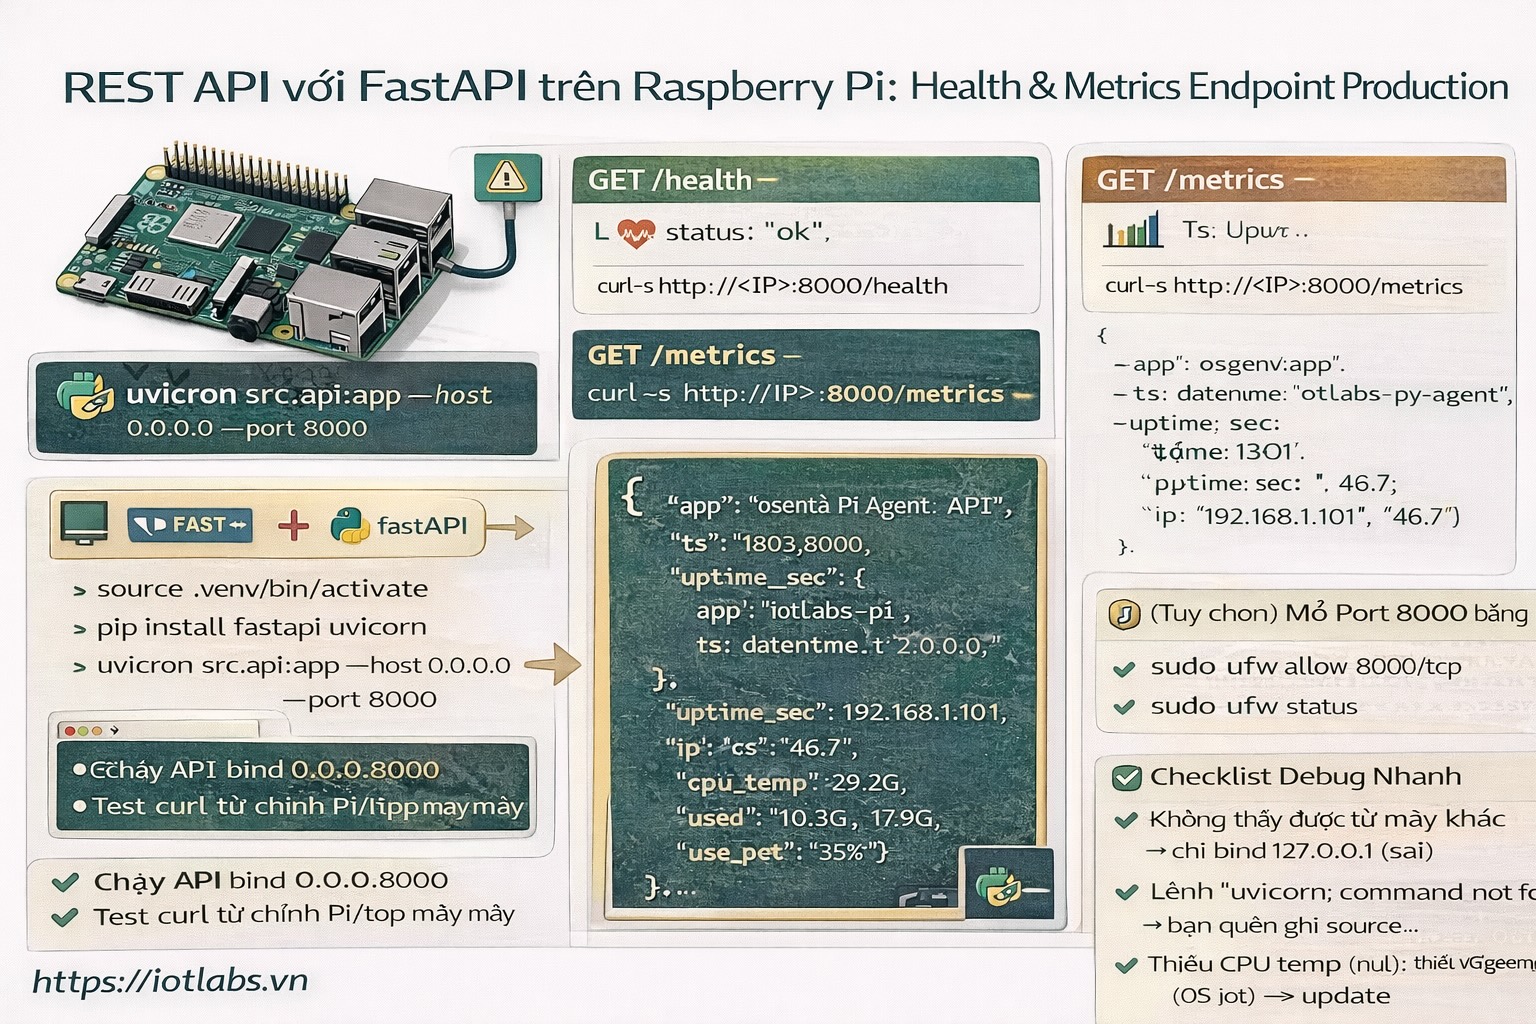
- GET /health (dịch vụ sống/chết)
- GET /metrics (thông tin hệ thống cơ bản: uptime, cpu temp, disk, ip…)
- Chạy API bằng uvicorn và test nhanh bằng curl.
- Sẵn sàng để bài sau chạy background jobs + scheduler.
2) Cài FastAPI + uvicorn trong venv
Trong project ~/apps/iotlabs-py-agent:
cd ~/apps/iotlabs-py-agent
source .venv/bin/activate
pip install fastapi uvicorn
3) Tạo module API
Tạo file src/api.py:
nano src/api.pyDán code:
import os
import socket
import time
import subprocess
from datetime import datetime
from fastapi import FastAPI

app = FastAPI(title="IoTLabs Pi Agent API", version="1.0.0")

BOOT_TS = time.time()

def get_ip():
    try:
        s = socket.socket(socket.AF_INET, socket.SOCK_DGRAM)
        s.connect(("1.1.1.1", 80))
        ip = s.getsockname()[0]
        s.close()
        return ip
    except Exception:
        return "no-ip"

def cpu_temp_c():
    # works on many Pi images; if not available, return None
    try:
        r = subprocess.run(["vcgencmd", "measure_temp"], capture_output=True, text=True)
        out = r.stdout.strip()  # temp=47.0'C
        if "temp=" in out:
            val = out.split("temp=")[1].split("'")[0]
            return float(val)
    except Exception:
        pass
    return None

def disk_usage_root():
    try:
        r = subprocess.run(["df", "-h", "/"], capture_output=True, text=True)
        lines = r.stdout.strip().splitlines()
        if len(lines) >= 2:
            parts = lines[1].split()
            # Filesystem Size Used Avail Use% Mounted
            return {"size": parts[1], "used": parts[2], "avail": parts[3], "use_pct": parts[4]}
    except Exception:
        pass
    return None

@app.get("/health")
def health():
    return {
        "status": "ok",
        "ts": datetime.now().isoformat(timespec="seconds"),
    }

@app.get("/metrics")
def metrics():
    return {
        "app": os.getenv("APP_NAME", "iotlabs-py-agent"),
        "ts": datetime.now().isoformat(timespec="seconds"),
        "uptime_sec": int(time.time() - BOOT_TS),
        "ip": get_ip(),
        "cpu_temp_c": cpu_temp_c(),
        "disk_root": disk_usage_root(),
    }
4) Chạy API local
Chạy:
source .venv/bin/activate
uvicorn src.api:app --host 0.0.0.0 --port 8000
Test từ chính Pi:
curl -s http://127.0.0.1:8000/health
curl -s http://127.0.0.1:8000/metrics
Nếu bạn gọi từ máy khác trong LAN:
curl -s http://<IP_CUA_PI>:8000/healthNếu không truy cập được từ LAN: kiểm tra firewall (Bài 4) và port 8000.
5) Tích hợp vào cấu trúc project (gợi ý)
Trong README.md, ghi rõ lệnh chạy:
- Dev run: uvicorn src.api:app –reload –host 0.0.0.0 –port 8000
- Prod run: uvicorn src.api:app –host 0.0.0.0 –port 8000
6) (Tuỳ chọn) Mở port 8000 bằng UFW
Nếu bạn bật UFW (Bài 4) và muốn truy cập từ LAN:
sudo ufw allow 8000/tcp
sudo ufw status
Nếu chỉ cho phép máy bạn (khuyến nghị):
sudo ufw allow from 192.168.1.10 to any port 8000 proto tcp7) Checklist debug nhanh
- uvicorn: command not found → bạn quên source .venv/bin/activate
- curl từ máy khác không được → port bị block (UFW/router), hoặc bạn đang bind 127.0.0.1 thay vì 0.0.0.0
- vcgencmd không có → một số OS thiếu tool; metrics vẫn trả về null là ok
8) Bài tập nâng cấp
- Thêm endpoint GET /version trả về git sha (nếu repo có git).
- Thêm field device.id từ config.yaml vào response /metrics.
- Chuẩn bị bài sau: chạy scheduler song song với API.